

RO System Leaking? Every Leak Point and Its Fix (2026)
Guide
A wet cabinet floor under an RO system is usually a five-minute fix wearing a scary costume. Under-sink RO systems leak from a short list of places — push-fit tubing, housing sumps, the feed adapter, the drain saddle, the tank valve, the faucet — and each has a specific cause and a specific repair. This guide works every point in the order leaks actually occur, starting with how to find the right one before touching a wrench.
First move: close the feed valve (and the tank valve) and mop up. Then dry every fitting, wrap each in dry paper towel, restore pressure, and wait: the first damp towel names your leak point. Nine times out of ten the fix is reseating one tube or one O-ring — no parts, no plumber. If your leak started during installation, our DIY install walkthrough marks the same points from the other side.
Table of Contents
Step 1: find the leak point first
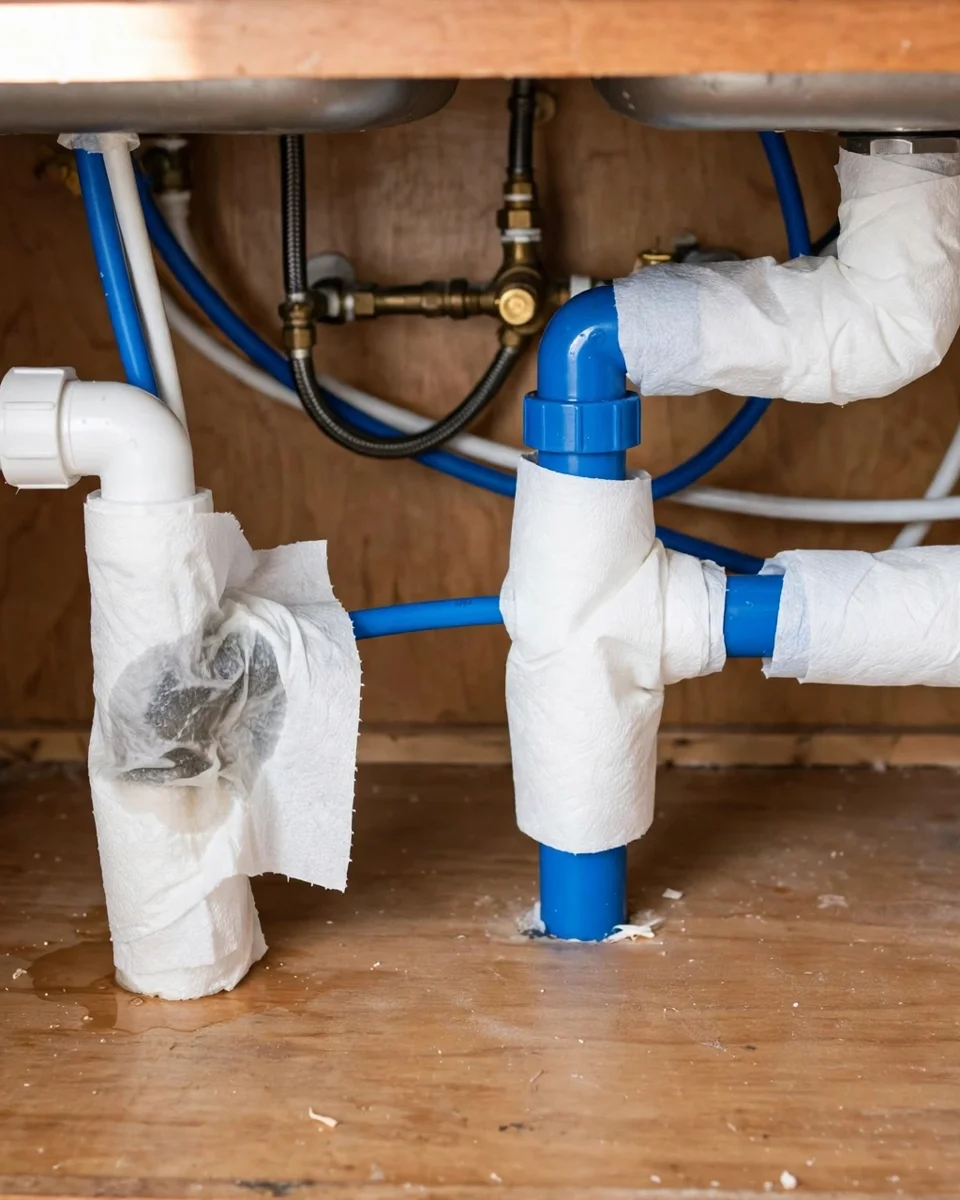
Water migrates: a leak at the top fitting drips off the bottom of the tank and gets blamed on the tank. So — feed and tank valves closed, system depressurized (open the RO faucet until it stops), every fitting wiped bone dry. Wrap a strip of white paper towel around each suspect: every push-fit connection, each housing seam, the feed adapter, the drain saddle, the tank valve stem, the faucet base. Reopen the tank valve, then the feed valve, and give it ten minutes under pressure. Check towels top-down; the highest damp towel is your source. Note also when it leaks: constant weeping suggests a pressurized-side seal; leaking only while the system produces water points at the drain side or the membrane housing.
Leak point 1: push-fit tubing

The champion. Push-fit (quick-connect) fittings seal on an internal O-ring gripped by a collet; a tube inserted almost-but-not-quite home seals at rest and weeps under pressure. The fix, with the water off and pressure relieved: push the collet in, pull the tube out, inspect the end — it must be cut square, unscored, and round. Trim 1/4″ off with a tubing cutter (a knife works if perfectly square), then push the tube in firmly until it passes the O-ring and bottoms at the tube stop — you will feel two stages of resistance. Tug test: a firm pull should not move it. Two related warnings: never use Teflon tape or sealant on a push-fit (the seal is the O-ring, and tape shreds foul it), and replace any tube whose end is scratched lengthwise — scratches are leak channels across the O-ring.
Leak point 2: housing sumps
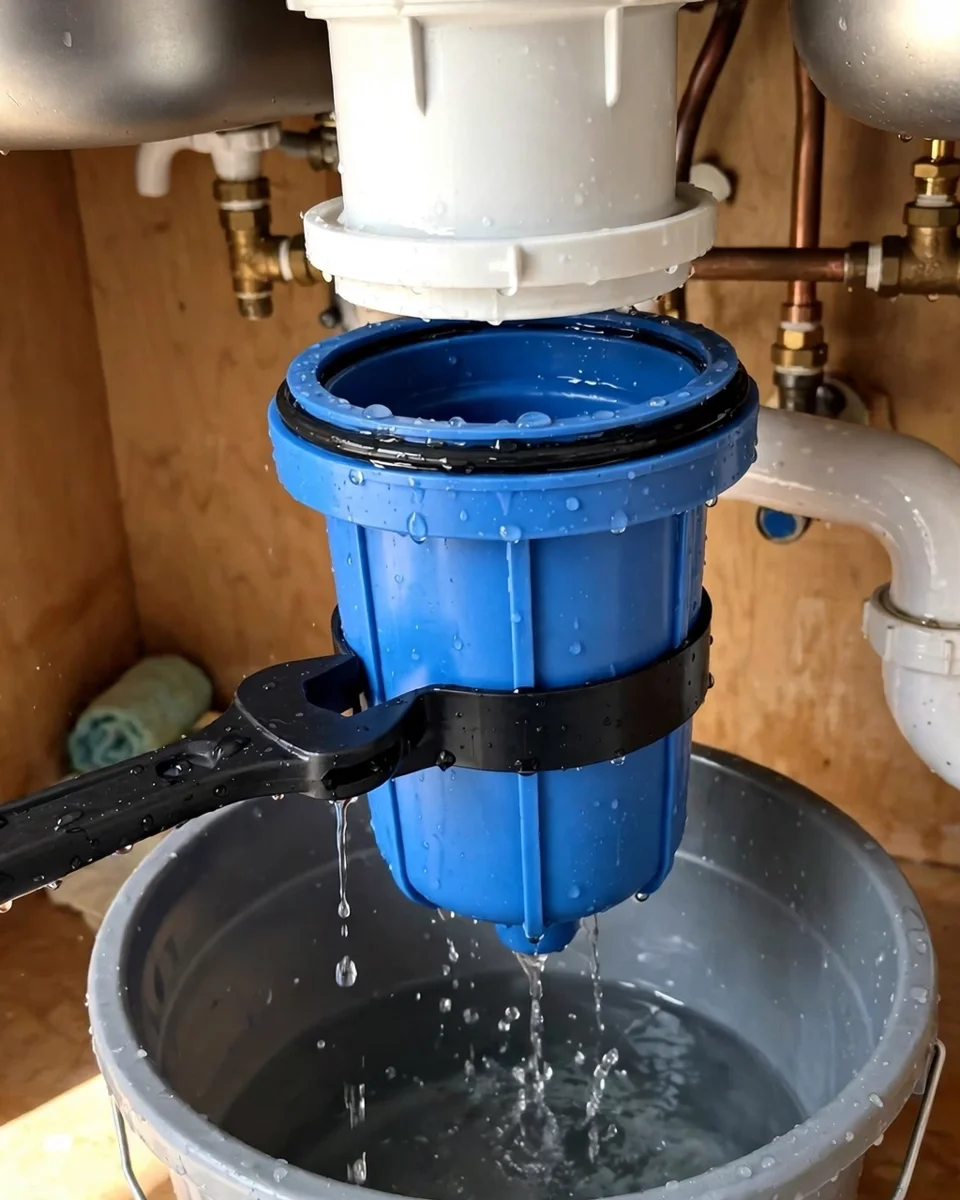
The big screw-on sumps seal on one fat O-ring at the rim. Leaks here usually start right after a filter change, from one of four causes: the O-ring fell out of its groove (or stayed in the old position and doubled), the ring is dry and dragged out of place during tightening (a smear of food-grade silicone grease — or even clean water — prevents it), the sump is cross-threaded or under-tightened, or the ring is simply old and flattened (replace it; they are cheap and universal by housing size). Reassemble with the ring seated flat all the way around, sump hand-tight plus about a quarter turn with the housing wrench. More torque is not more seal — overtightening distorts the ring and cracks sumps, the same lesson as fridge cartridges in our fridge leak guide.
Leak points 3 to 7: feed, drain, tank, faucet, membrane
- Feed adapter (at the cold-water valve): threaded, so this one does take Teflon tape — 3–4 wraps on the male threads, re-make the joint snug. A weeping adapter is usually under-taped or cross-threaded plastic; take it apart and start the threads by hand.
- Drain saddle: leaks here appear only while the system is producing (drain water flowing). The saddle’s foam gasket must sit centered on the drilled hole; loosen, re-center, retighten the two bolts evenly. Also confirm the drain tube is fully seated in the saddle fitting.
- Tank valve: the small valve threaded into the tank’s top takes Teflon tape on its threads. A leak from the tank’s air-valve stem (the bicycle-style cap on the side) is different and terminal — that indicates a ruptured internal bladder; the tank is replaced, not repaired.
- RO faucet: drips at the base usually trace to the product tube’s connection underneath or a loose stem nut; a drip from the spout hours after use is typically the air-gap drain line partially clogged, pushing drain water up — clear the drain tube run to the saddle.
- Membrane housing: the long horizontal housing seals with O-rings on its cap and on the membrane stem itself. A cap leak = reseat/replace the cap O-ring; a leak that worsens as the tank fills can be the membrane’s stem rings unseated — pull, reseat the membrane fully, reassemble.
Prevention: the 10-minute habit
Most RO leaks announce themselves as seeps long before they become puddles. The habit that catches them: at every filter change (schedule in our RO filter-change guide), after repressurizing, run the towel-wrap check for ten minutes. Keep a $5 water alarm (a battery puck that chirps on contact with water) on the cabinet floor permanently — it converts a weekend-ruining flood into a beep and a towel. And route tubing with gentle slack loops, never taut: a tube under side-tension works its way out of its collet over months.
Conclusion
Shut the feed, dry everything, let a paper towel name the point — then fix the point: push-fit tubes re-cut and pushed to the stop, sump O-rings seated flat and greased, tape only where threads live, and no heroics with the housing wrench. An RO system has seven leak points and all seven answer to the same calm procedure.
Update log
October 2026: Guide published; fixes follow standard push-fit and housing manufacturer guidance for mainstream under-sink systems.
FAQs
Why does my RO system leak only when it is making water?
Production-only leaks live on the drain side or under working pressure: the drain saddle gasket, the membrane housing cap, or a push-fit joint that only weeps when the system pressurizes the membrane. Run the towel-wrap test while the system is producing (tank valve closed forces continuous production) to catch it in the act.
Should I use Teflon tape on RO fittings?
Only on threaded joints: the feed-water adapter and the tank valve. Never on push-fit (quick-connect) fittings — they seal on an internal O-ring, and tape fragments can foul that seal. Also never on compression flare faces or the housing sump (its O-ring does the work).
My RO leaks right after every filter change. What am I doing wrong?
Almost always one of two habits: the sump O-ring dragged out of its groove because it went on dry (lubricate it, and confirm it is seated flat before threading), or a tube got disturbed during the change and not pushed back to its stop. The towel-wrap check for ten minutes after each change catches both while they are still seeps.
Water is coming from the little valve on the side of the tank. Fixable?
That is the tank’s air valve, and water there means the internal bladder has ruptured — the air charge and the water are no longer separated. The tank cannot be repaired; replacement tanks are inexpensive and universal by thread size. Confirm first that it is water, not a puff of air, before ordering.
Can high water pressure cause RO leaks?
It aggravates every marginal seal. Homes above roughly 80 psi static pressure stress push-fits and sumps alike; if leaks recur at different points, measure the house pressure. A pressure regulator is a house-level fix, and some RO makers recommend a pressure limiter on the feed for exactly this situation.
When is an RO leak a plumber job?
When the leak is in the house plumbing rather than the RO’s own connections (the shutoff valve itself, soldered joints), when a housing or tank has cracked, or when water has been leaking long enough that cabinet or floor damage needs assessment. Everything at the RO’s own fittings is designed to be serviced by hand.